{ Case Study }
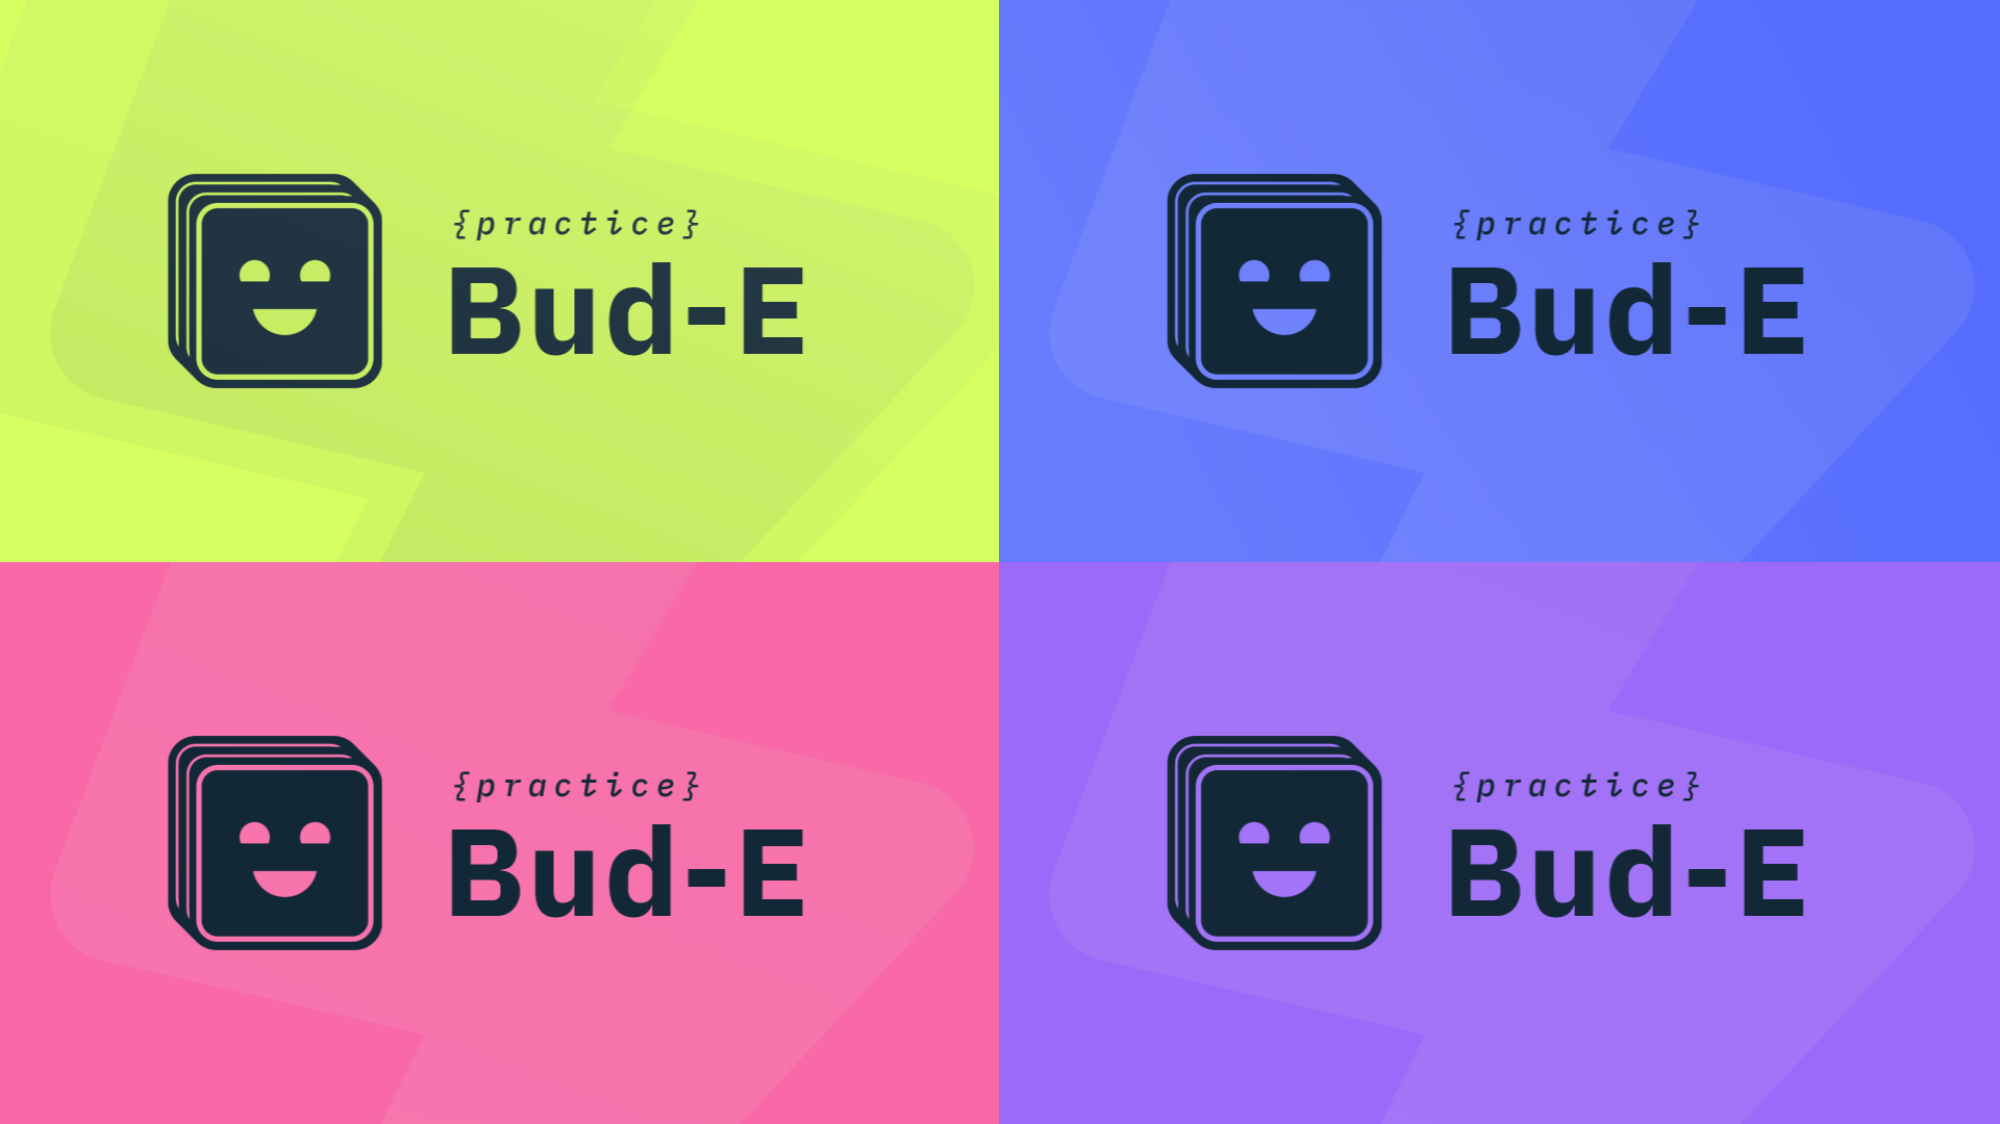
Practice Bud-E
This project is the final consolidation of my Interaction Design thesis. Over the course of 2 semesters I took on multiple roles and worked to better understand this problem space through multiple iterations utilizing UX research methods and design thinking skills.
Problem Space
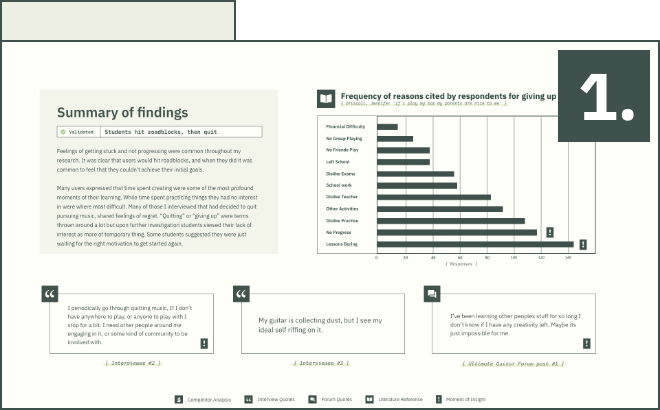
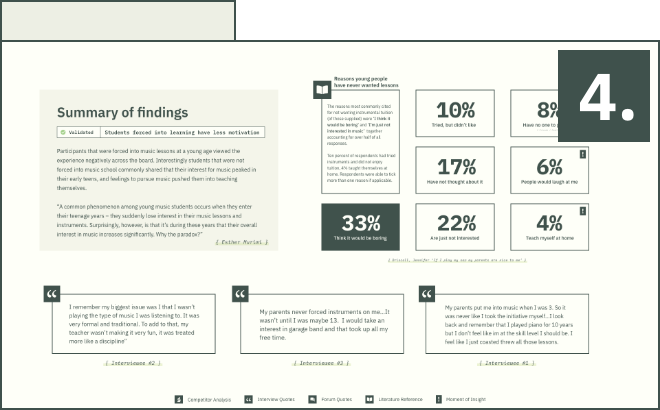
With so many distractions diverting todays youth, learning a new instrument can often feel like a discipline or chore. Through extensive research I discovered that todays youth suddenly lose interest in their music lessons and instruments at the beginning of their teen years - surprisingly, however, it’s during these years that their overall interest in music increases significantly.
Why the paradox ?

{ Case Study }
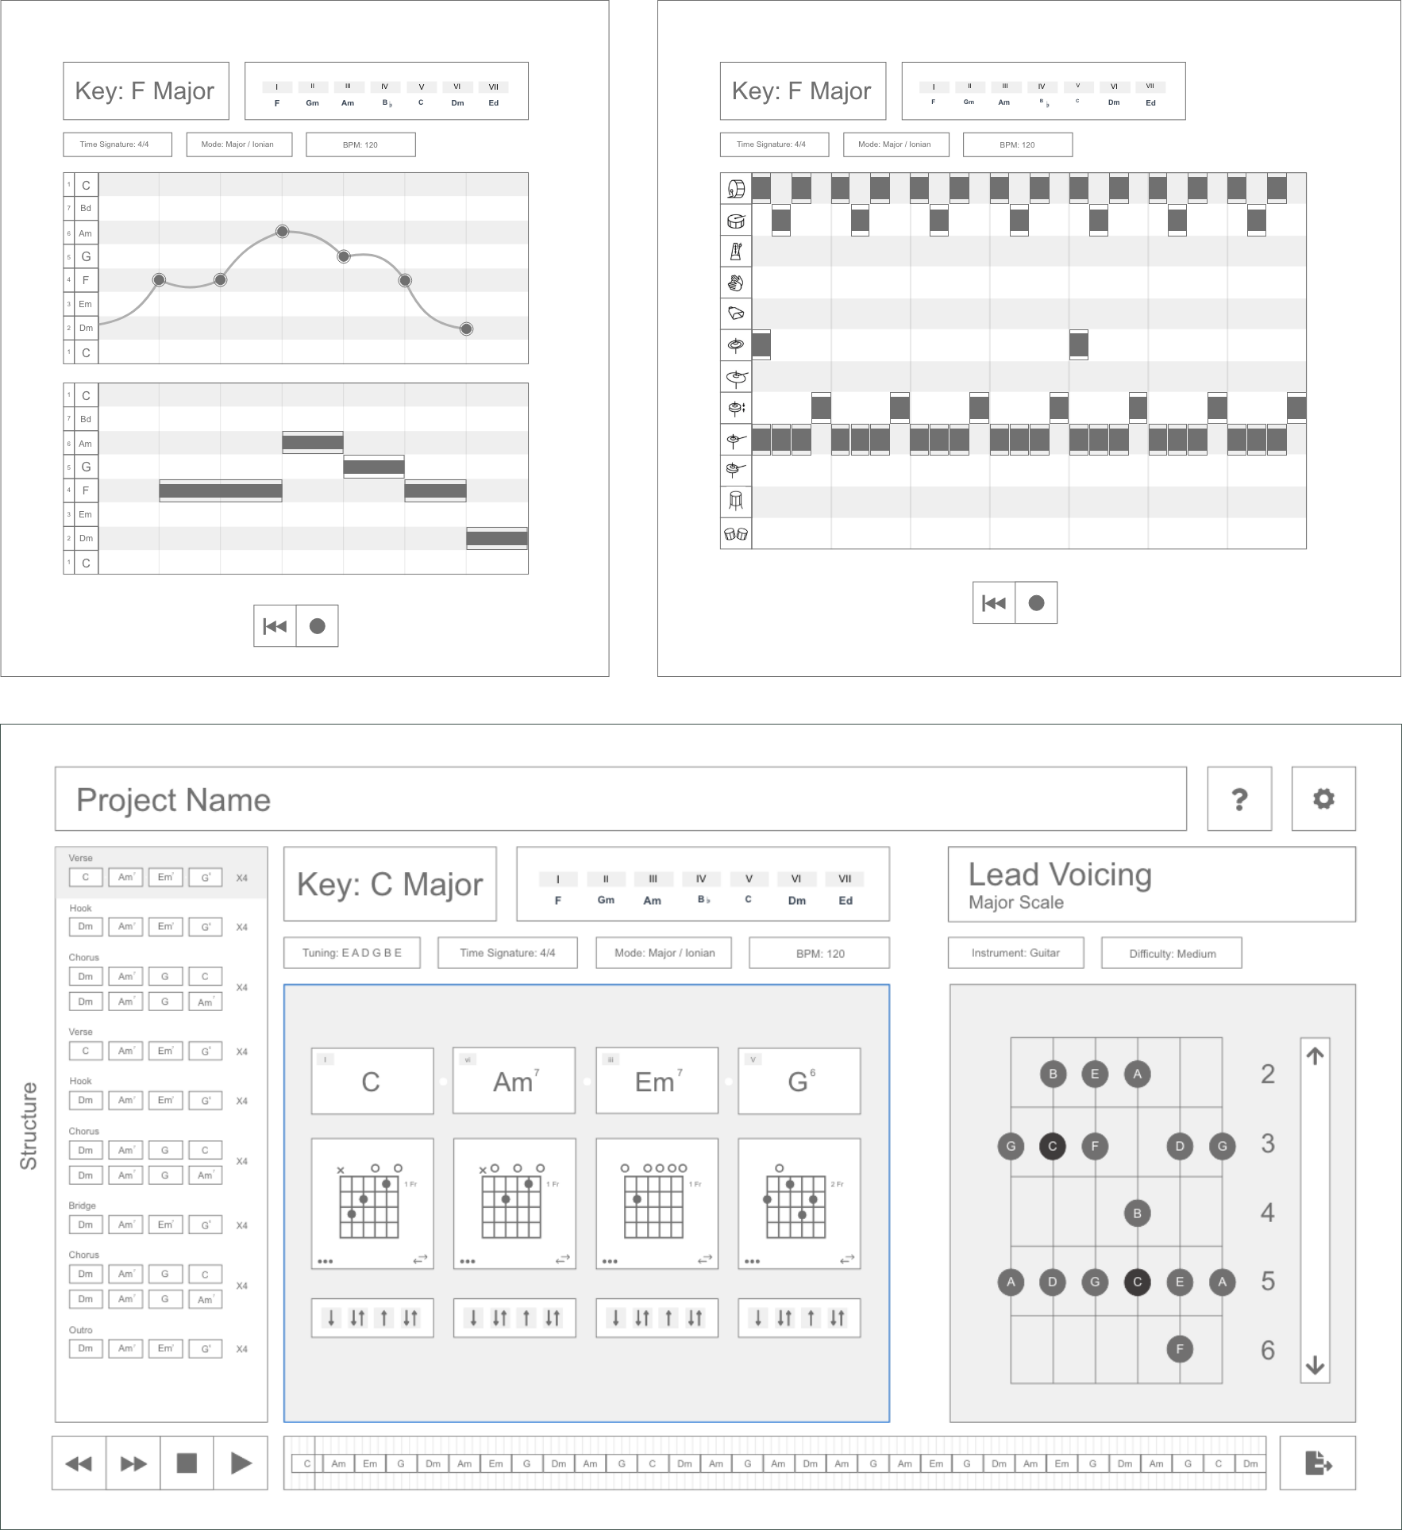
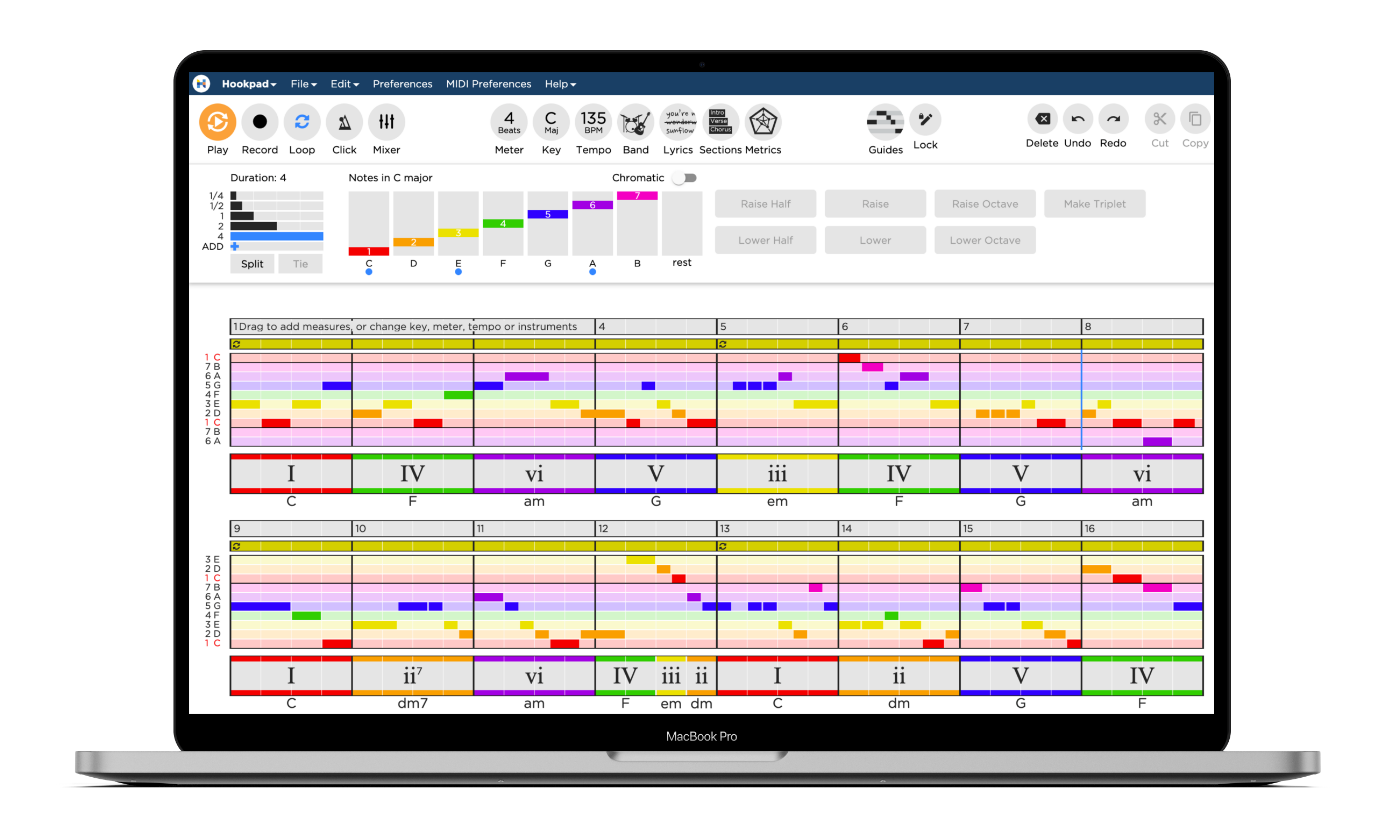
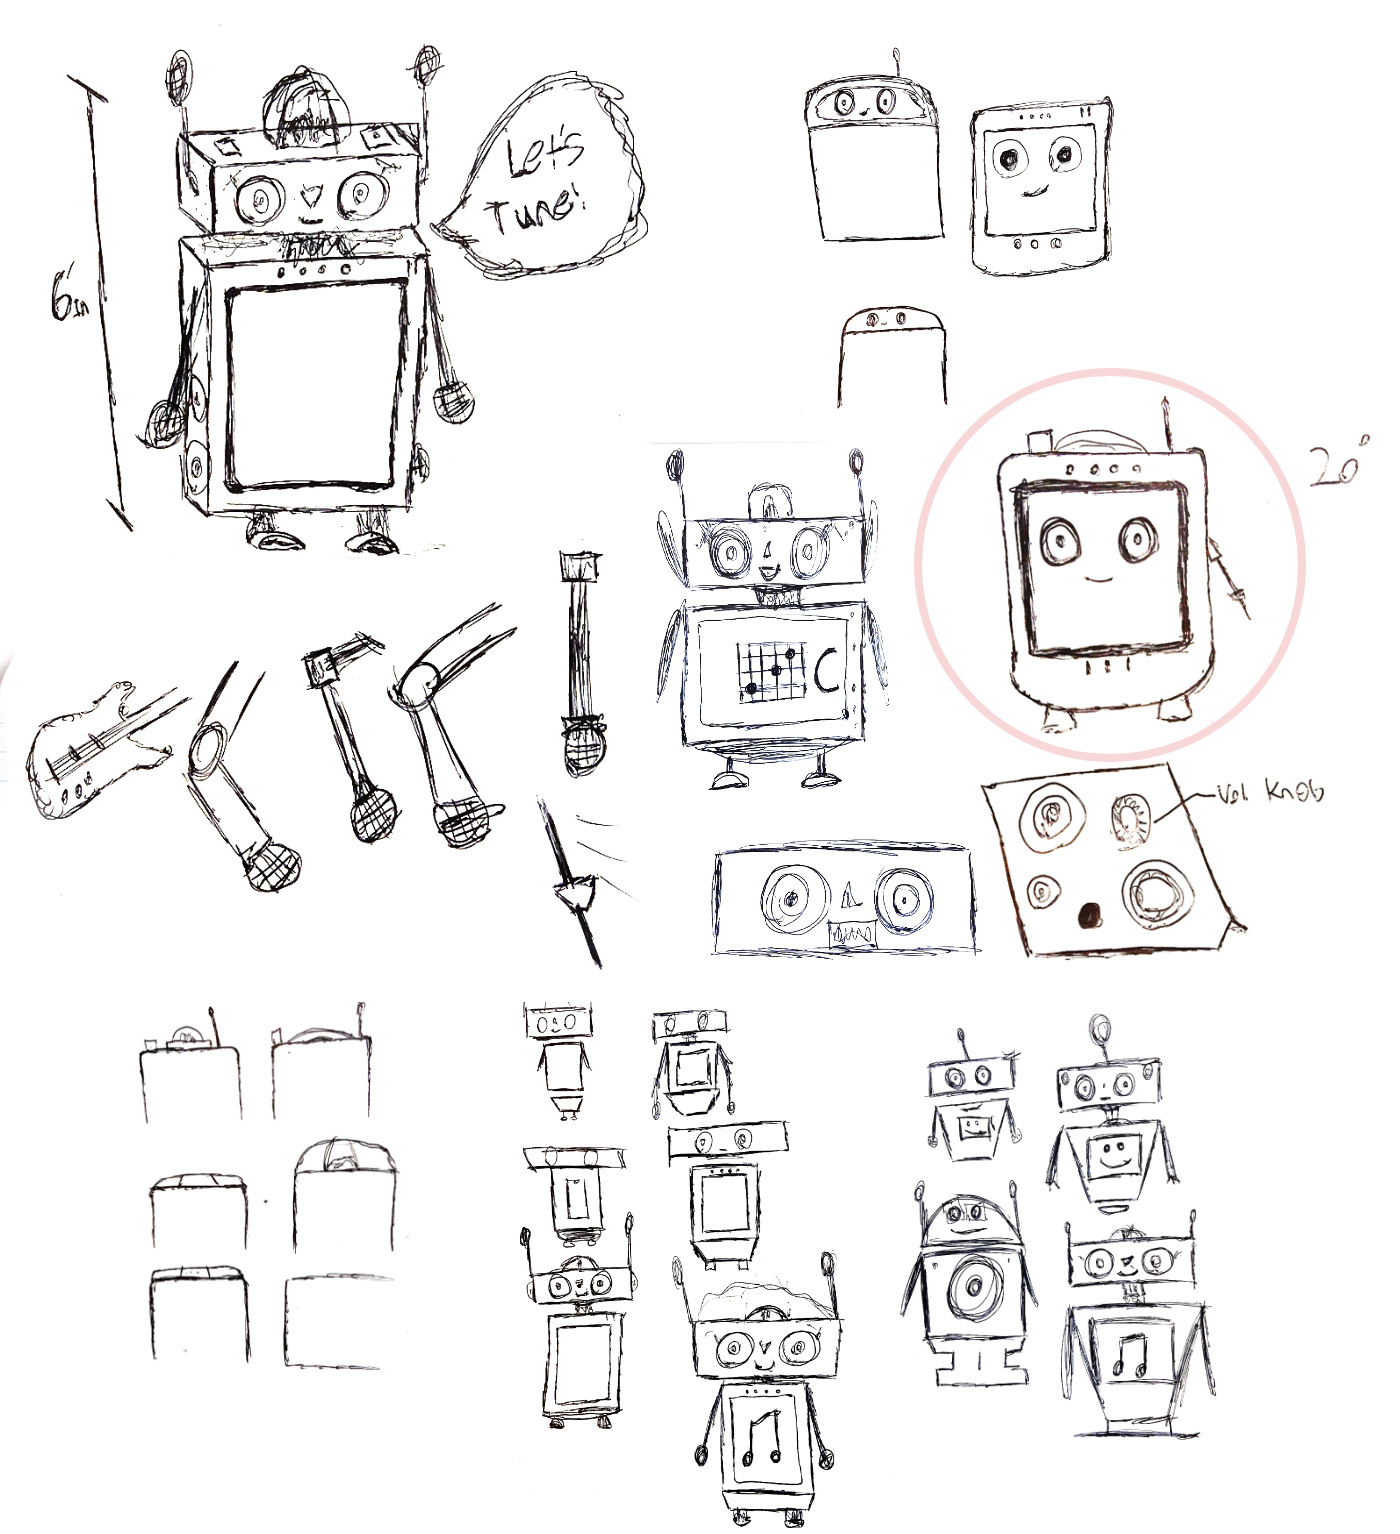
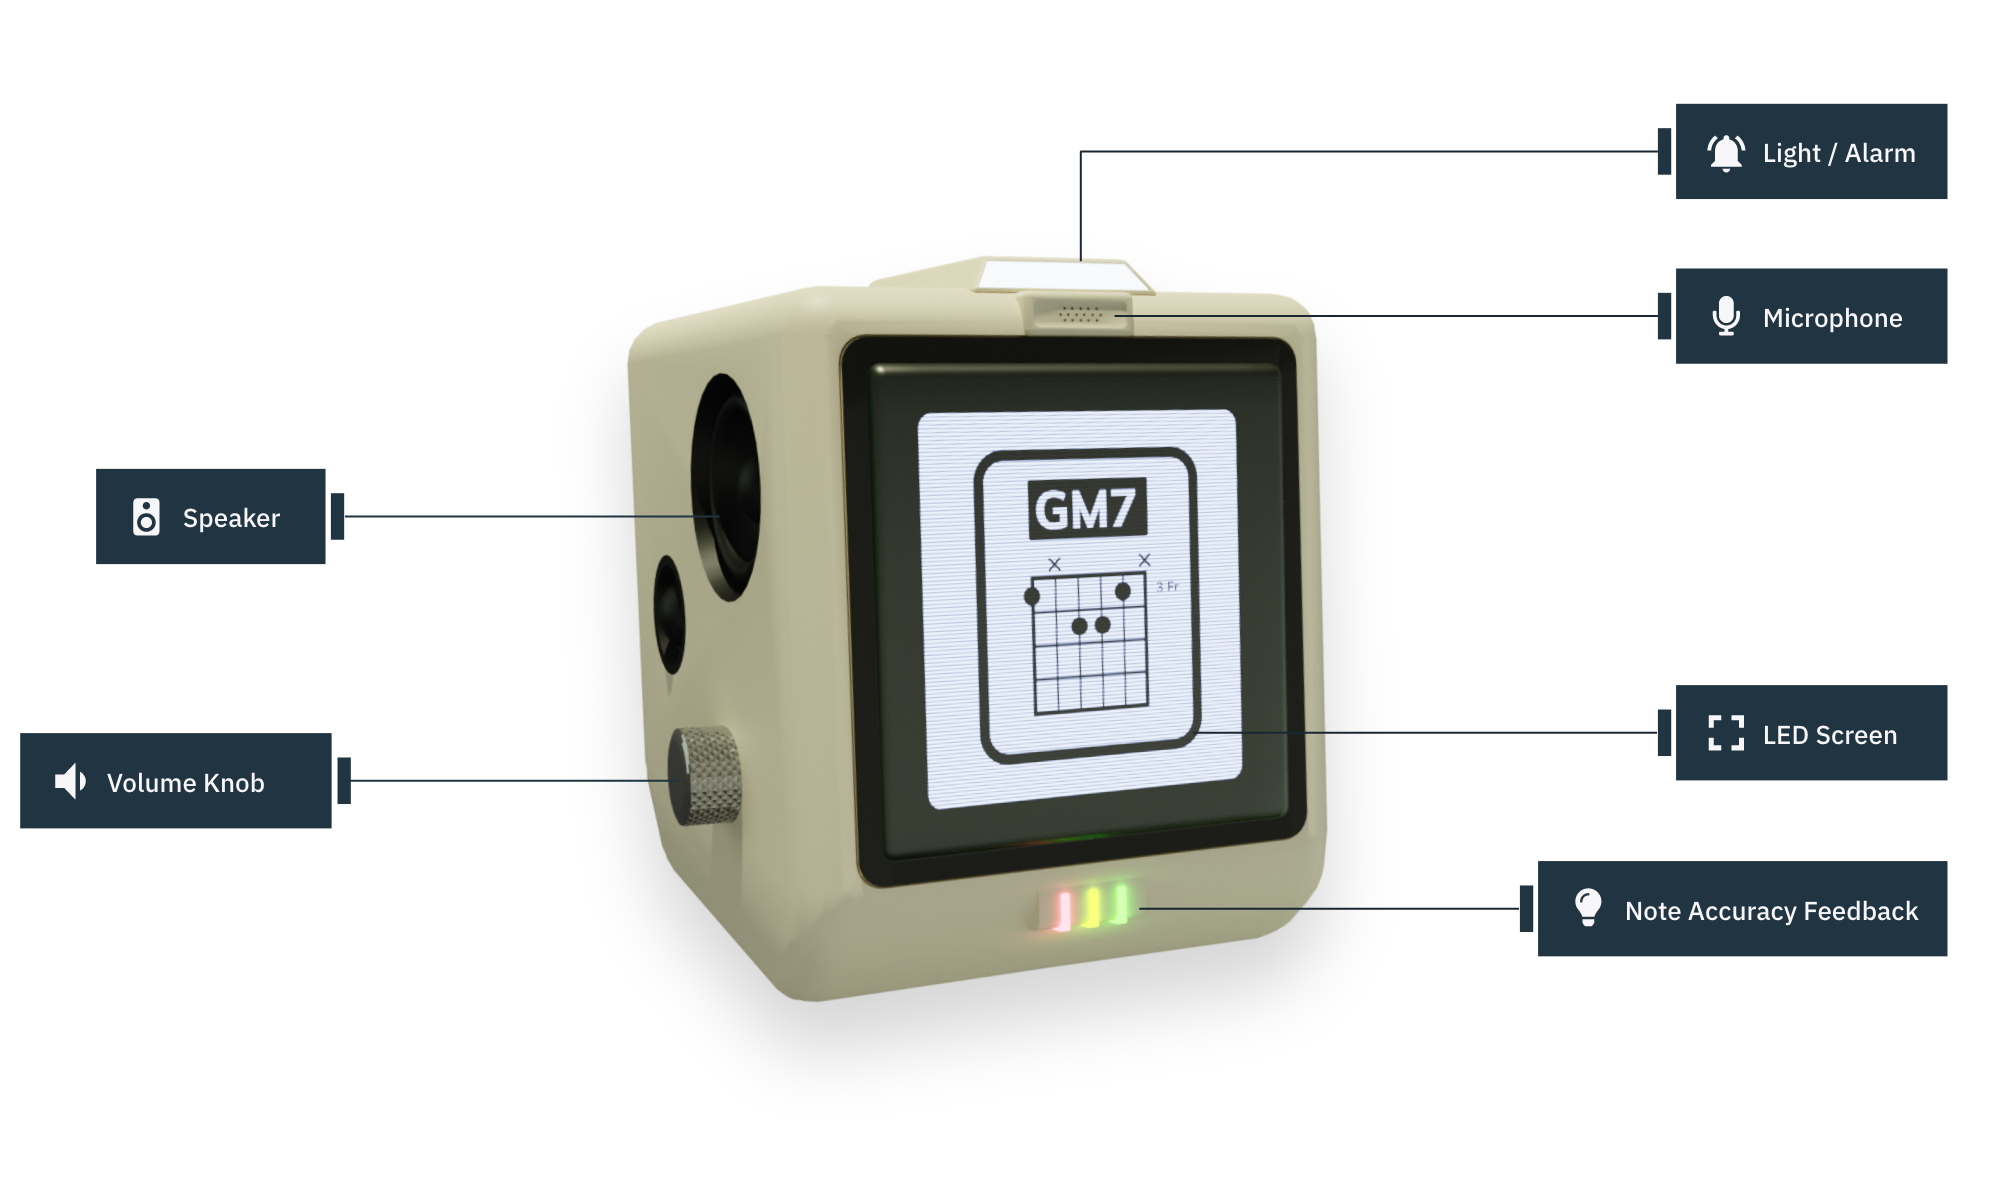
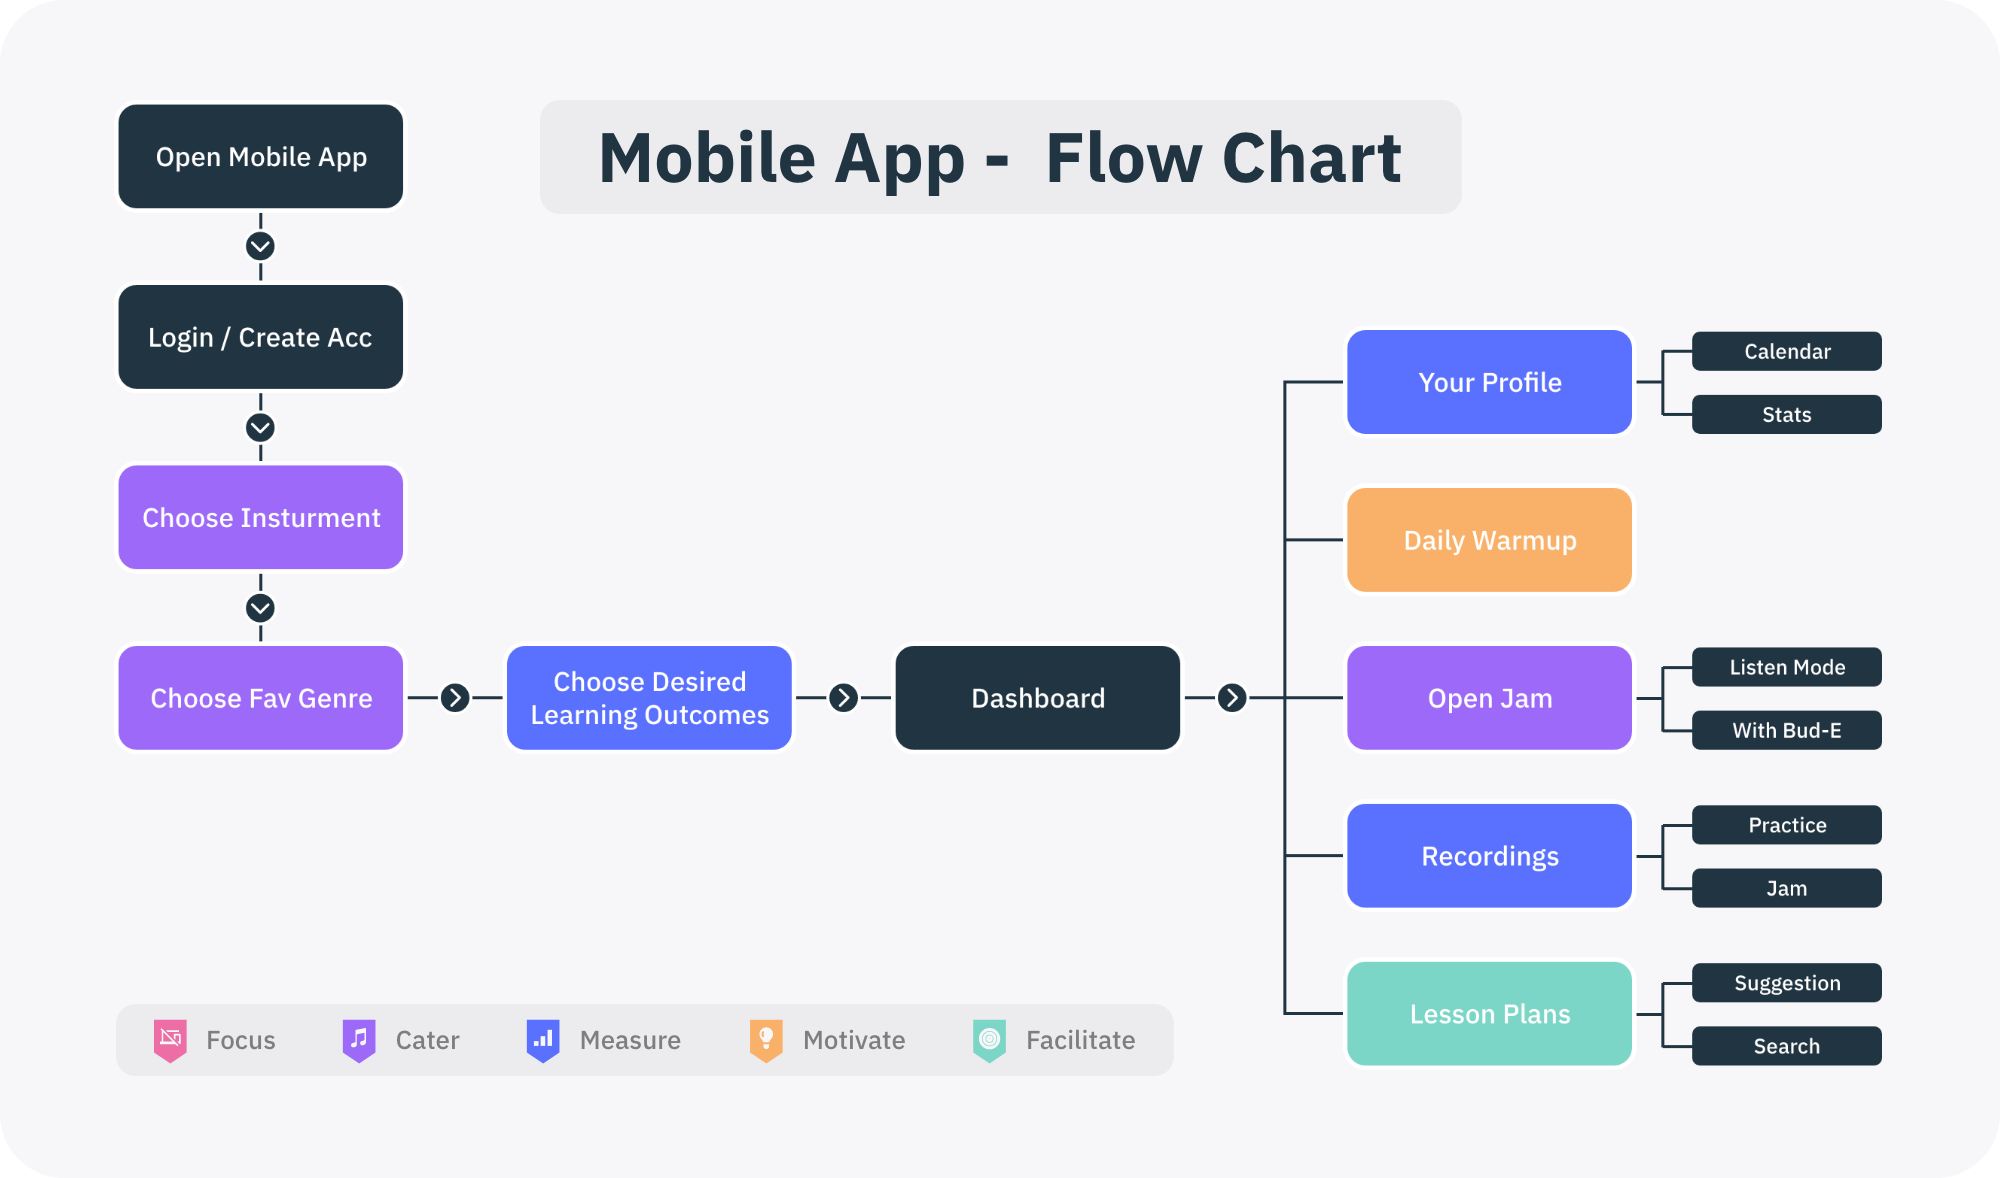
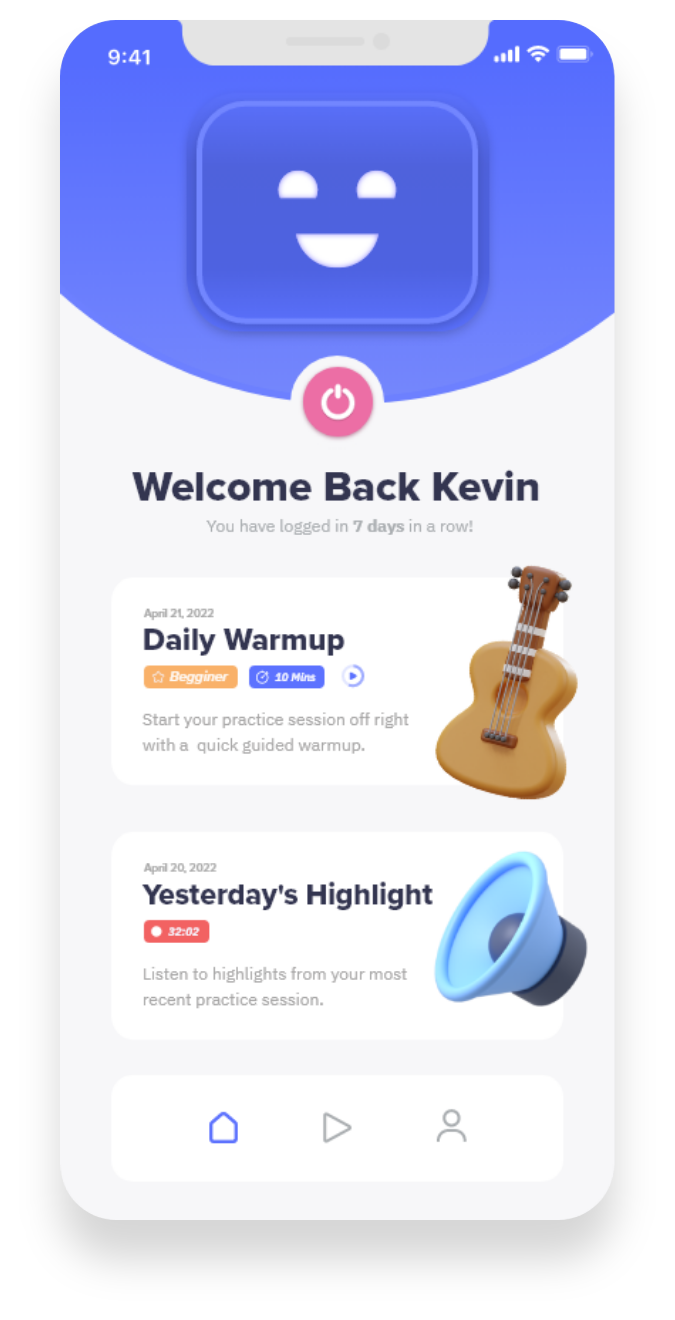
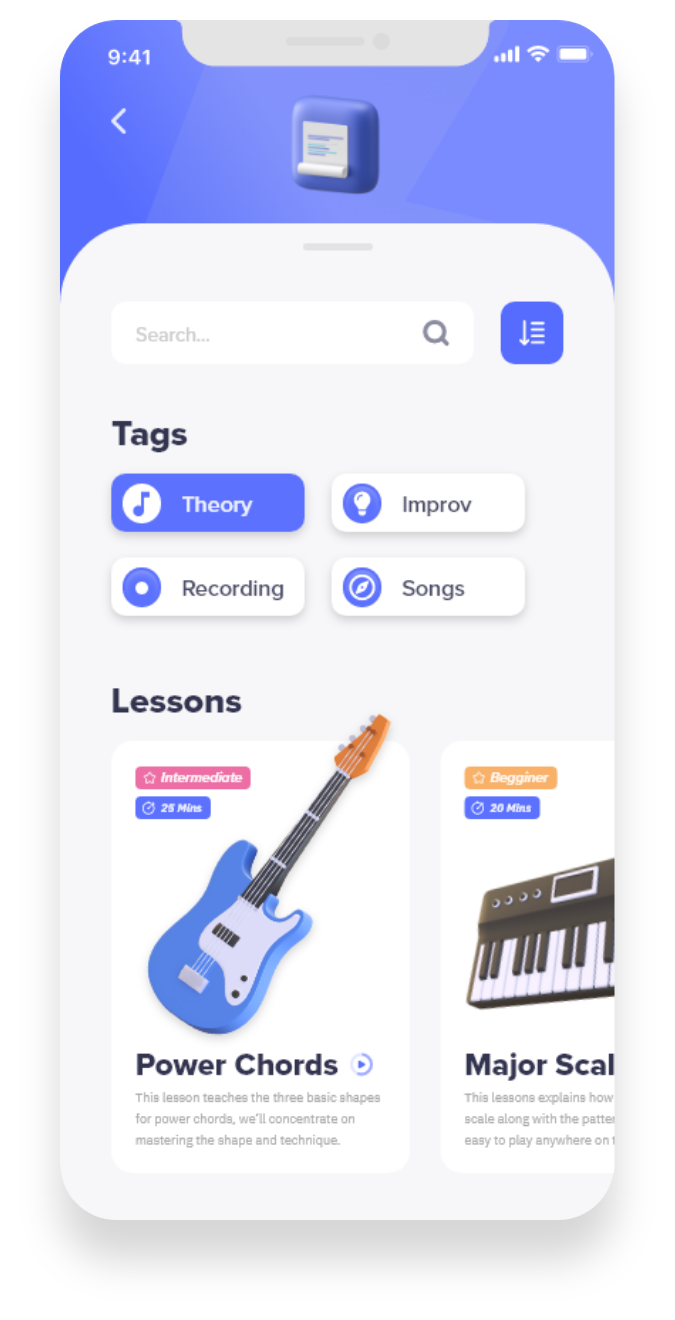
What is practice Bud-E?
Practice Bud-E serves as a guide and mentor to help users discover their unique voice in music. By employing a creation first learning approach and prioritizing self expression in music over mundane theory lessons, Bud-E helps users navigate music by putting user interests first and uncovering a unique and ideal path for success.